• Hey, guest user. Hope you're enjoying NeoGAF! Have you considered registering for an account? Come join us and add your take to the daily discourse.

COVID-19 Cooking At Home With Fellow GAFers

Hello and welcome, fellow lockdownee, I am your host Master Chef Deedeedeepee and on today's show we will be sharing easy, fulfilling, relatively-healthy recipes that you can cook all by yourself at home while the government installs dystopian plague-brackets on all your windows and doorframes.

As chicken tendy supply dwindles, I want to make sure you can feed yourself and your family. You should be able to cook a variety of meals from scratch ingredients instead of relying on restaurants / fast-food / supermarket foods to hold you over.

chef-35582114.jpg


This episode is all about the audience participation, so please post recipes and links for easy-to-make foods following these guidelines:

1.
recipes should not require exotic or expensive ingredients.
2. recipes that use shelf-stable ingredients receive 1.5x points and +20% critical damage (use dry, canned, or other long-term preserved goods)
3. don't cough on the food

Since we're approaching St. Patrick's Day and since I have Irish heritage, it only makes sense that I would kick off the participation with one of my favorite cheap foods:

حمص بالطحينة‎ + خبز‎
(Hummus + Pita)

2 cups cooked chickpeas (canned is okay)
1/2 cup olive oil
1/4 cup tahini (sesame paste)
1/4 cup lemon juice (fresh squeezed is best)
2 TBSP cold water
2 - 4 garlic cloves
2 TBSP of ground cumin
1 TBSP of ground paprika
1 tsp of salt + more to taste

1. Soak dry chickpeas overnight, then boil in a pot of water for 90 minutes. Check occasionally so that the pan doesn't go dry from water evaporation
2. Drain chickpeas
3. While still hot, add chickpeas, olive oil, tahini, lemon juice, water, garlic, cumin, paprika, and salt to your blender, food-processor, or mortar.
4. Blend until smooth.

The main flavors here are the olive oil, the tahini, the lemon, the cumin, and the garlic, with salt as your foundation, so play with these ingredients until you find a texture and flavor that you appreciate. If you find it is too thick, try adding lemon juice and/or oil and/or cold water to reach the desired consistency.

I was raised on the "real" stuff, so I appreciate strong lemon and strong garlic in my recipe.

Buy the tahini that a lebanese mother would buy. There should be arabic writing on the jar:
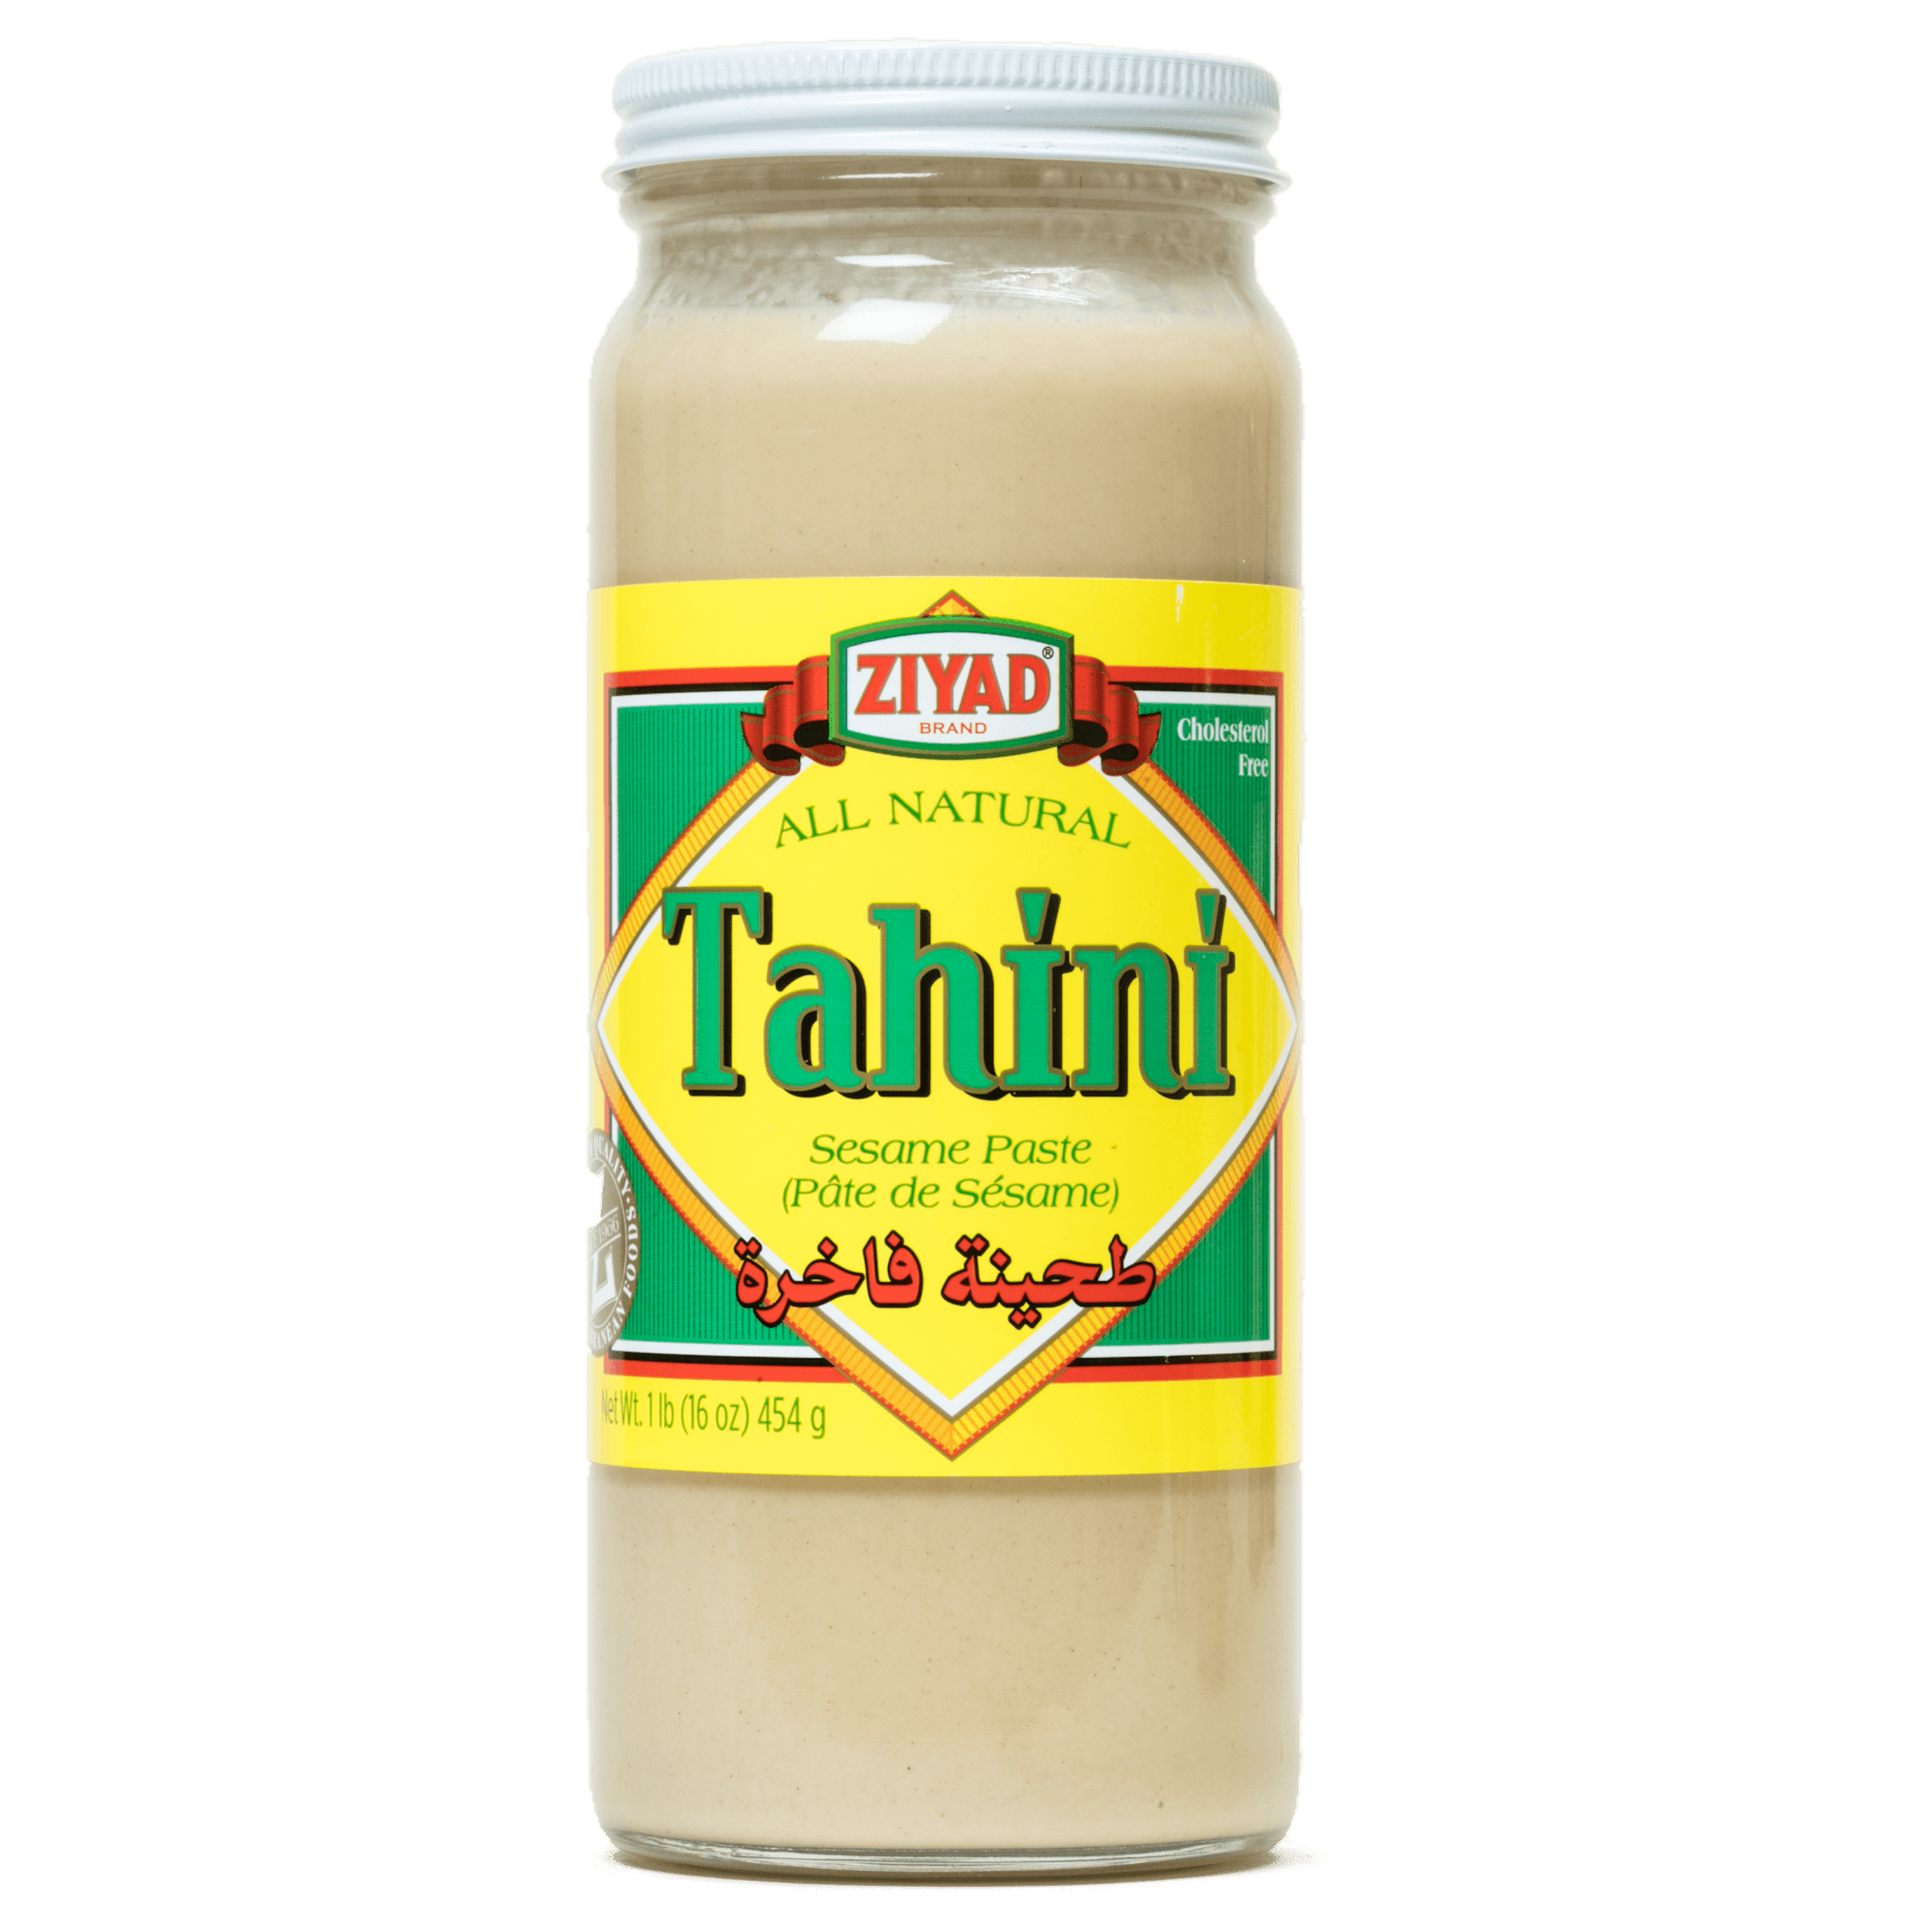
37080_sil-tahini-ziyad-brand-tahini


One moment.

chef-sneezing-over-food-picture-id1096988978


mature-chef-sneezing-over-food-ingredients-kitchen-setting-mature-chef-sneezing-over-food-ingredients-136019186.jpg


My apologies. Now let's knead some dough with our bare hands. Kneading dough is the most important part of any bread recipe, so if your structure is poor (small holes, too dense) then you likely didn't knead it enough. 5 minutes of kneading is the average for most recipes.

4 cups all-purpose flour
1 1/4 cups warm water
1/4 cup olive oil
1/4 cup refined sugar
1 TBSP yeast (added to warm water)
1 tbsp salt (added last)

1. Mix the yeast into warm water. Even instant yeast will benefit from this step.
2. Combine the flour, water, yeast, oil, and sugar in a large bowl
3. Add the salt
4. Knead for 5 minutes.
5. Please, don't cheat. 5 minutes seems like a lot but we want good bread.
6. Cover the bowl and let rise for 60 minutes
7. Preheat oven to 475F / 245C. Place a flat metal pan or baking sheet inside to warm up.
8. Flour the counter and roll into thin discs.
9. In batches, cook for about 2 minutes (maybe more) until the bread begins to inflate like a balloon and/or the edges on the bottom starts to brown
10. Let cool, then enjoy fresh or freeze for long-term storage

If you prefer your pita to be fluffier, add just a bit more water at the beginning. If you prefer your pita to be thin and slightly cardboard-y, the trick is to roll your loaves as thinly as possible and to only cook for about 1 minute.

Hopefully you'll be able to enjoy the lockdown with a table full of delicious meals.

elderly-professional-chef-man-isolated-260nw-158291879.jpg


And remember Rule #3: Don't cough on the food.
 
Last edited:
Okay paisanos, continuing the St Patrick's Day theme, here is another simple recipe. Italians GET ITT.

Simple pasta + tomato sauce

2 ~28oz cans of whole, peeled san marzano tomatoes. Cento and Alessi are two brands I like.
1/4 cup olive oil
2 cloves garlic
2 anchovies
1 TBSP soy sauce
1 tsp Marmite
2 TBSP all-purpose flour
1/2+ cup red wine
fresh tomatoes (if available)
fresh onions, chopped (the more onions the merrier, IMO)
basil, oregano, red pepper flakes for seasoning

1. Chop onions (and other veggies that need to be cooked, like green pepper)
2. Sizzle on low / medium-low heat with the olive oil until the onions start looking translucent
3. Mash the anchovies, Marmite, garlic, soy sauce into a paste, then add into the hot pan. Cook while stirring 1 minute.
4. Add in flour and cook while stirring at least 1 minute. The flour should "soak up" the remaining oils and begin to brown.
5. Deglaze with the wine. A little bit at a time. Keep stirring.
6. Add in fresh (not the canned yet) tomatoes then simmer on low / medium-low heat until the wine reduces, 5m at least
7. Add in the cans of tomatoes including the sauce it is packed in plus your seasonings.

Advice on the red pepper flakes: you should have enough in the sauce so that you can feel a tiny bit of "heat" but it should never be spicy.

And for the pasta...

Either boil up a box of pasta or make your own with flour + raw eggs + water and a pinch of salt.

Just open a can of sardines and swallow the content. The postapo world is only for strong.
Sardines and tuna are great sources of fat + protein, which are hard to come by in a lockdown world. Look at any food shortages in the past 100 years and fats + protein are always valuable foods to have.

I also suggest cans of coconut milk. Black beans + rice + coconut milk + whatever sauce/flavors is a filling and hearty meal.
 
Last edited:
Screw it, I'm just gonna steal one of her older recipes. I'm gonna get a lump on the head though cuz it's one of her first back when she just started...

-Cold busting chicken soup to get you better fast-

I’ve been able to avoid getting sick most of the time by taking extra care of myself at the very first sign of sickness. I like to load up on some elderberry syrup, herbal tea, and this cold busting chicken soup. It’s an amped up version of the chicken noodle classic, so that you get even more health benefits.

Taking care of yourself

I can always tell when I’m about to get sick because I get that tired, run down feeling. If I ignore it, then I know in a few days I’m going to feel extra crappy. Preventative measures, like eating healthy, and taking care of yourself to relieve stress is important, but sometimes life gets in the way of those things. It never fails; I get busy, the stress builds, I indulge in sugar to keep me going and then bam…I’m sicker than a dog.

Sometimes life throws you a curveball, and as much as you want to, you just don’t have time to take care of yourself like you should. The great thing about this chicken soup, is that not only will it help you be healthier, but it also gets dinner on the table. You can double the recipe if you’d like and freeze the extra for some other time. I like to make enough for several meals, especially since it takes me several days of targeted care to really get over a cold or flu.

Antibacterial ingredients

Onions and garlic both have potent antibacterial properties to help kick your cold to the curb. I’ll often eat a slice of raw garlic in some raw honey every few hours when I’m sick, and it usually takes care of it completely. This study showed that onion was effective at killing multiple strains of bacteria. Garlic is even better, as it can take care of not just bacteria, but viruses and fungus as well. You really want fresh garlic though, as the active ingredient is no longer viable an hour after smashing the garlic clove.

Oregano is also a powerful antibacterial herb, so I like putting some in this chicken soup. I’ve used thyme because its great for soothing coughs, and helping the body to expel excess mucus from the lungs and throat. If you can find fresh herbs that’s best, but dried will absolutely work, and is what I use in winter anyway.

Mineral rich sea salt

Every soup known to man has salt, so why am I mentioning it here? Sea salt is full of trace minerals that our bodies need for optimal health. I like using light grey celtic sea salt, but Himalayan or Redmond’s real salt are also great choices. Just don’t use the cheap, bleached iodized “sea salt” at your local big box grocery store. That stuff is glorified table salt and just as toxic (source).

Boost circulation for faster healing

I normally use ground black pepper when cooking, but this soup uses cayenne pepper. Cayenne gives it a little kick, but it also increases circulation to speed healing in the body. Cayenne also helps to break up and move congestion from the body, which is great for stuffy noses. It has antibacterial properties, boosts the lymphatic system and aids digestion and detox (source).

Apple cider vinegar is another key player in this recipe. It may sound strange to include vinegar in your soup, but the acidity really helps round out the flavor and makes it taste amazing! I learned this from Sarah Britton’s cookbook, Back to Your Roots, which just happens to be my all time favorite recipe book. Apple cider vinegar doesn’t just make the soup taste better though, it helps the body detox, aids digestion and so many other things to help you get better faster.

No chicken in chicken broth?

I was a little surprised when I read the back of the box on my organic chicken broth and realized that it was just organic chicken “flavors.” Umm, what happened to the chicken? Making your own broth is super easy.

I make it with kitchen scraps for a broth that costs nothing, but tastes fabulous and is full of vitamins and minerals. I cook a whole chicken, then take the meat off for meals, like this chicken soup recipe and make broth with the bones. I just recently got an instant pot, so I’m looking forward to making my broth in there next time, since it’s so much faster than my crockpot!

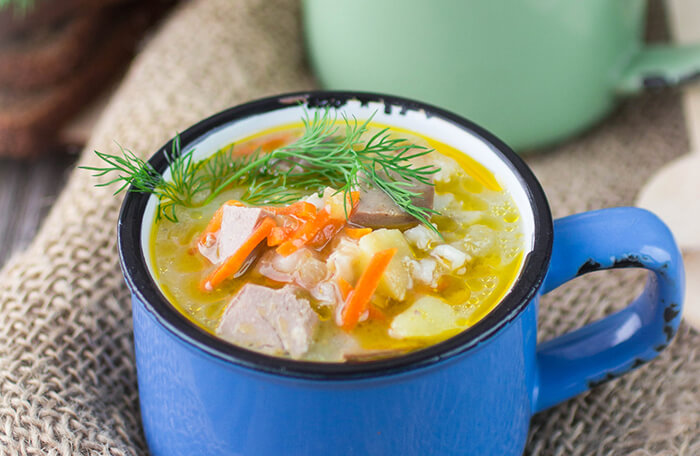
chicken-soup-horizontal.jpg


Ingredients


  • 1 onion, diced
  • 4 stalks of celery, thickly sliced
  • 6 carrots, thickly sliced
  • 2 cups green beans, cut into 1-2 inch pieces
  • 3-5 cloves of garlic (I use the lesser amount if they’re really large)
  • 1 T. unrefined sea salt, or more to taste
  • ½ tsp cayenne pepper
  • 2 T. apple cider vinegar
  • 2 tsp oregano (I like lots of herbs, so I use 1 T.)
  • 2 tsp thyme (I like lots of herbs, so I use 1 T.)
  • 2 chicken breasts, or 4 cup shredded chicken
  • 12 cups of nutrient rich bone broth, preferably homemade

Instructions


  1. In a large pot with a lid, or slow cooker add all of the ingredients together and stir to combine.
  2. Bring the mixture to a boil, then reduce to a simmer and cook until the veggies are soft, or about 45 minutes.
  3. Taste your soup and adjust the seasonings as desired. Remember, that you can always add more in, but you can’t take it out! You can also add a little more water if you like it brothier.
 

Sejan

Member
Homemade sourdough bread is surprisingly easy to make and only requires 3 ingredients once you have your starter ready and made. The bread keeps for a week and costs less than a quarter to make.

Starter:
(Takes 2 weeks to make from scratch, but will last forever as long as you take care of it, but you can buy a starter pretty easily)
Feed it daily. Either use part of it or dump half of it. Feed with equal parts water and unbleached flour.
If you aren't using it daily, it'll keep in the fridge for a pretty long time and only takes a day to recover.

Bread:
Mix 100 grams of stater with 250 grams of water well.
Add 394 grams of flour and 8 grams of salt and mix well.
Leave on the counter alone for at least two hours
Fold in half multiple times being careful not to rip the dough
Over the next few hours repeat the folding process a few times.
After at least 6 total hours either bake it or put it in the fridge overnight. (The bread will continue to strengthen in flavor and yeast content in the fridge)
If you put it in the fridge, take it out in the morning and let sit on the counter at least 6 hours repeating the folding process a few times.
Bake for 40 minutes in an all metal container covered (A dutch oven is ideal, but I use a metal loaf pan covered with aluminum foil.)
Uncover the loaf and bake until you like how the crust looks 3-10 minutes or so.
Let it cool a bit before cutting.
 
So, if everything does go to crud because of this virus or more probably... stupid people... it's a good idea to have a garden started. You are going to be eating a lot of greens, if you aren't already. If you run out of salad dressing, or just want a healthier alternative without all the heavy metals and such...

This is gluten and dairy free to whom it may concern. Also, I'm pretty picky. We regularly make this now, it's that good.

-Poppy Seed Dressing-

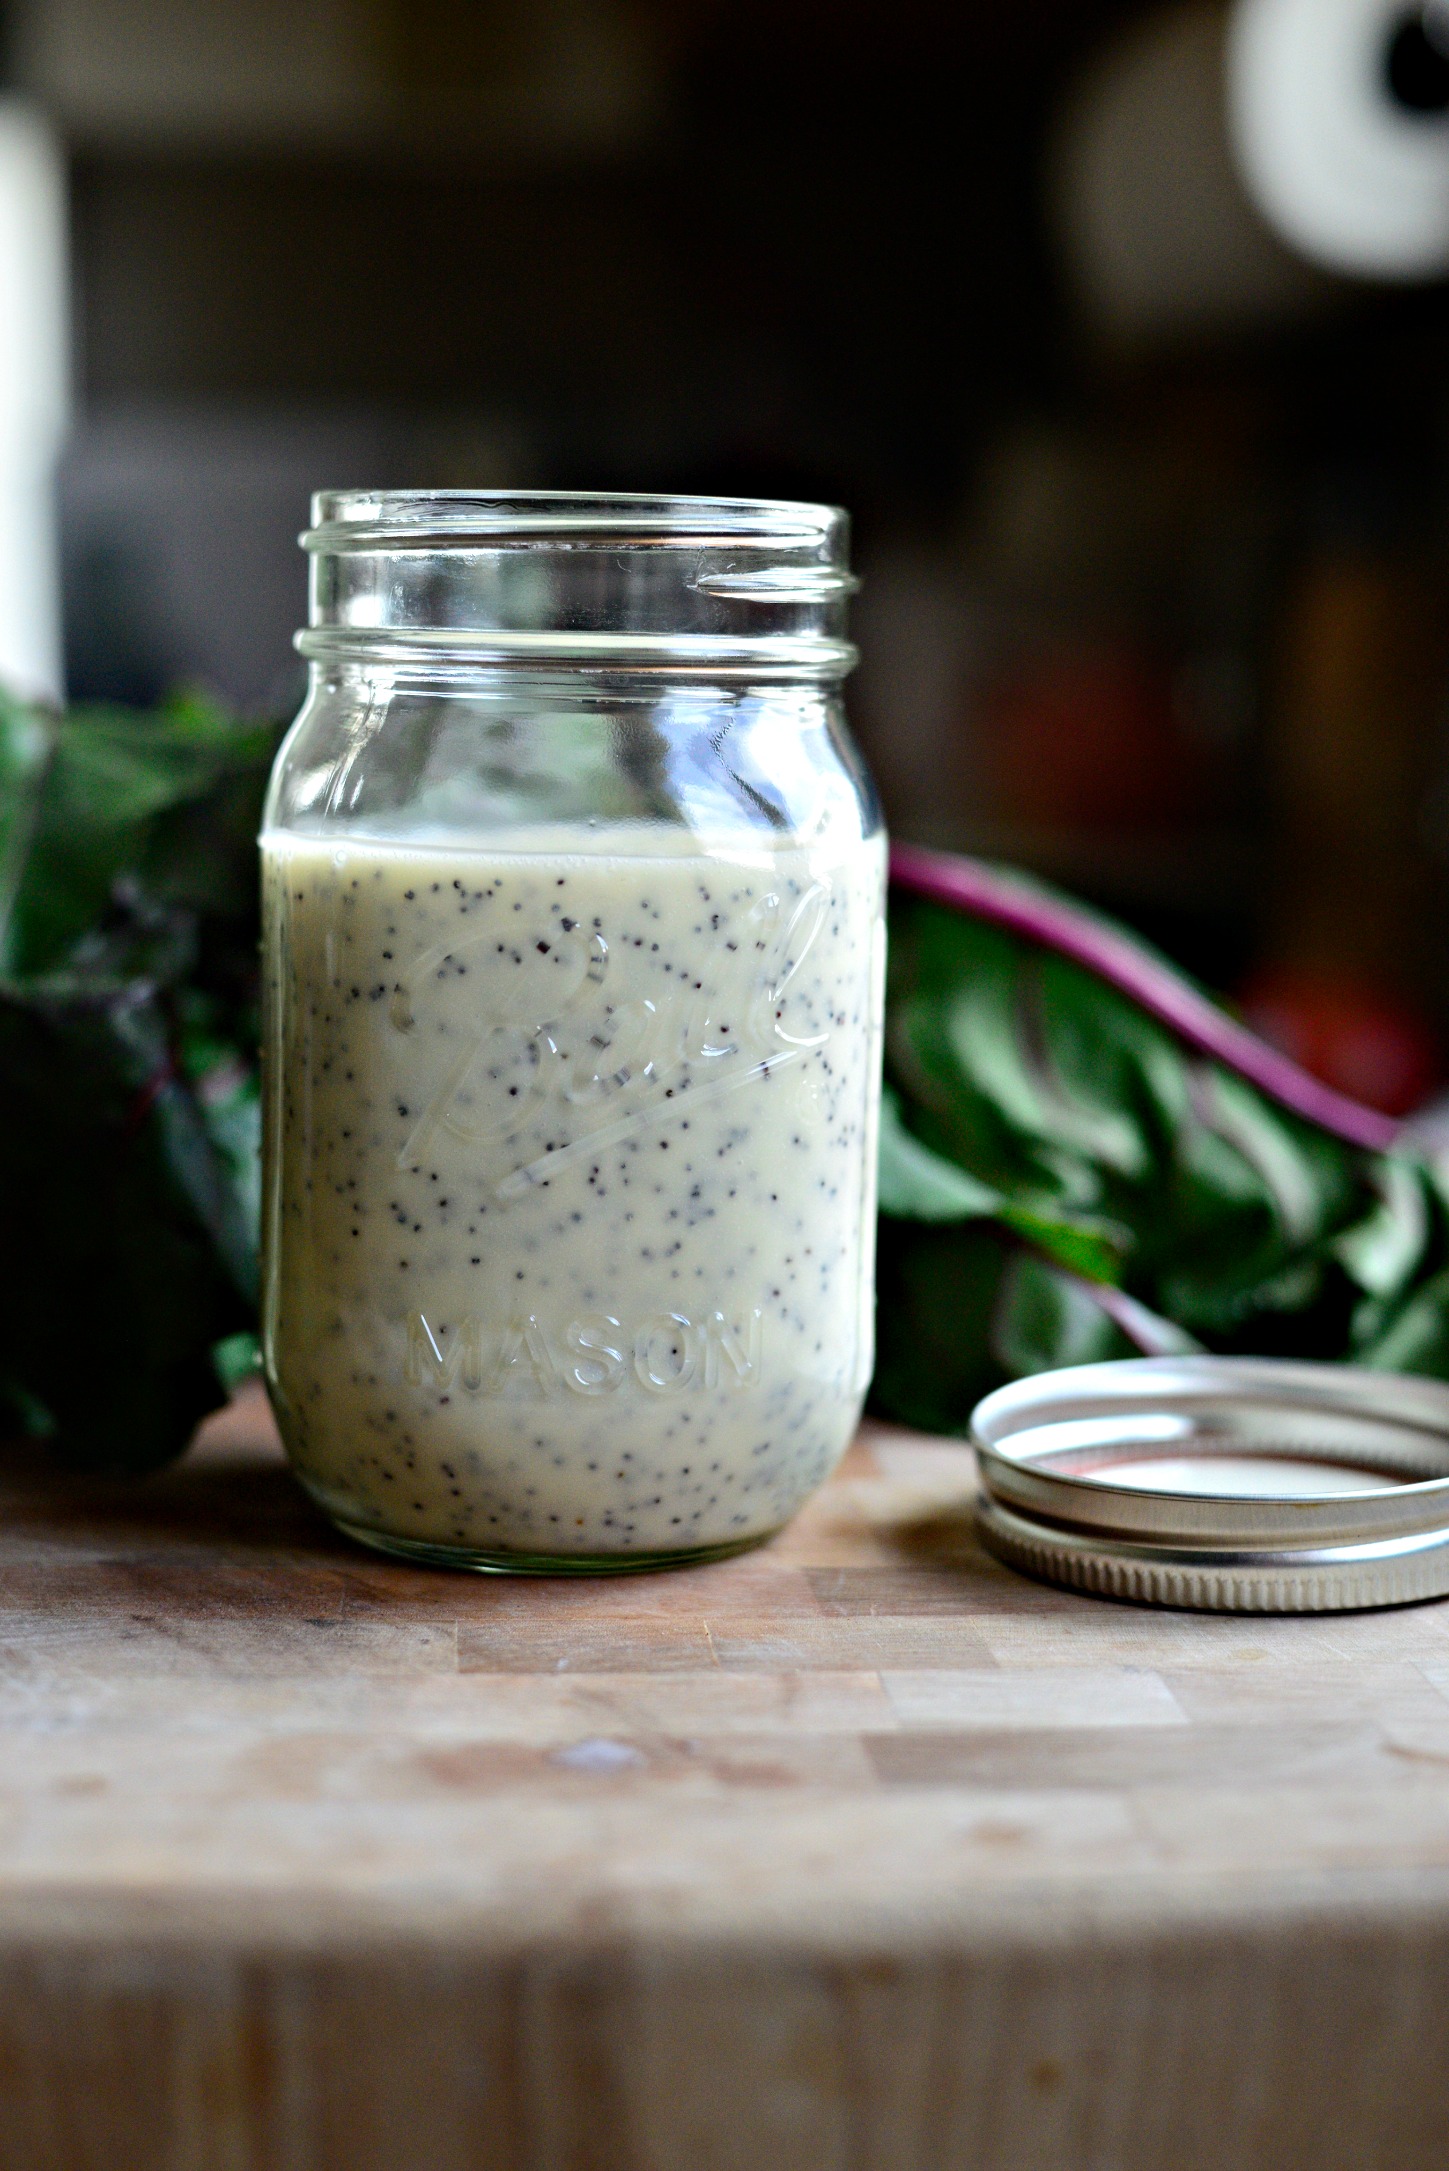
Honey-Poppy-Seed-Dressing-l-SimplyScratch.com-9.jpg


Ingredients


  • 1/3 cup white vinegar
  • 2/3 cup sugar (rapadura, or evaporated cane crystals, aka cane sugar)
  • 1 tsp ground mustard
  • 1 tsp onion powder or 2 tsp minced onion
  • 1 cup olive oil
  • 2 Tbsp poppy seeds

Instructions


  1. Heat vinegar and sugar in saucepan on stove just until the sugar is dissolved. You don't want this to simmer or get too warm.
  2. Pour the vinegar into a blender and add the mustard and onion. If you're using a high power blender like a Vitamix then minced onion will work fine, otherwise be sure to use the powder.
  3. Blend on medium-high until the ingredients are well combined, about 10-20 seconds.
  4. Turn the blender on high and take the top off. If you have the option, just remove part of the top so that you can pour the oil through.
  5. SLOWLY begin to pour the oil into the blender as it's running. After about a third of the oil is in you can begin to pour faster. Turn the blender off
  6. Pour in the poppy seeds and pulse a few times, just until combined.
  7. The dressing will be fairly warm, so you'll probably want to put it in the fridge for about an hour before using it.
  8. Store in a closed container in the refrigerator.
 
Something fun to make for the kiddo's while on lockdown. (I definitely don't request these for myself... no sir...)


Green Eggs and Ham

I make “green eggs” for breakfast and my little one loves the color. And I love that they’re full of veggies … he just doesn’t know it. The book “Green Eggs and Ham,” makes eating these eggs even more fun for kids.


We like to top the eggs with salsa and cheese, but these are good even without it. And I promise, they don’t taste like spinach! Recipes usually add milk to eggs when they’re scrambled, but there’s enough liquid here with the spinach.


This recipe works best with a high speed blender, since it will really liquefy the spinach and you won’t be left with any green spinach flecks. I have a refurbished Vitamix that I really like, use every day and it cost about half of a new one. A regular blender or even a ninja blender won’t get it as smooth, but it will get the job done and you’ll have yummy green eggs that the kiddos will love!

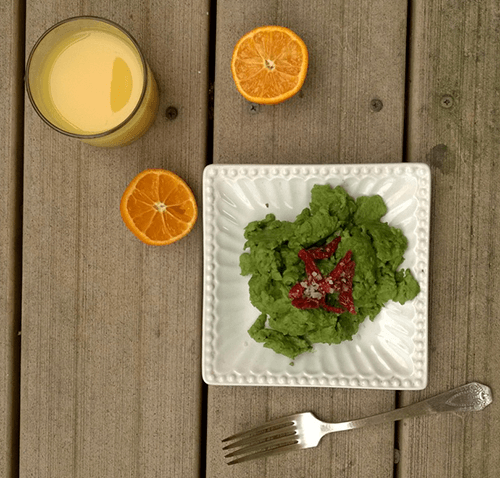
green-2Beggs1.png


Ingredients


  • 6 pastured eggs
  • 1 cup packed fresh spinach leaves
  • 1/2 cup cubed ham or ground, cooked sausage (optional)
  • Salsa and cheese (optional)
  • 1-2 tsp coconut oil or pastured butter

Instructions


  1. Combine the eggs and spinach in a blender until smooth. It will get foamy, but that's ok.
  2. Pour the mixture into a heated pan greased with a fat.
  3. If using, sprinkle the ham or sausage over the eggs.
  4. Cook over medium low heat, stirring occasionally until they look moist, but not goopy.
  5. Top with cheese and/or salsa if desired.
 
Want to boost your immune system using a large jar, salt, water, caraway seeds, and head of cabbage?

(for research on the health benefits of natural 'kraut)

Sauerkraut! ( Yoshi Yoshi get ITT)

1 head of cabbage per 1/2 gallon jar (so typically 2 heads per 1 gallon crock, 4 - 5 heads of cabbage for a 2 gallon crock, etc.
water
salt (pink himalayan or other high-mineral salts, if possible)
dry caraway seeds
extra seasonings and hard veggies, as you see fit

0. Peel the outer cabage leaves whole, rinse, and set aside for later
1. Slice cabbage into ribbons or chunks. The size of the piece (as long as it isn't too thick) won't affect the fermentation process
2. place cabbage and 1 TBSP salt per head of cabbage into a large bowl
3. Work the salt into the cabbage with your hands by squeezing firmly. The cabbage should start to "squeak" as the salt works its way in.
4. Let rest a minimum of 1 hour in an open spot on the counter
5. Pack layers of cabbage + the salty brine into a tall jar or crock. It needs to be clean and watertight. I prefer to push it down, sprinkle some caraway seeds on top, pack another two inches of cabbage, sprinkle on more caraway, more cabbage, and so forth.

IMPORTANT: leave about 3 inches from the top. Pack the remaining sauerkraut into a second jar (but you might be surprised by how much more can be packed in if you use a wooden spoon to push it down.)

At the top of the kraut, layer several of the outer cabbage leaves, uncut and as whole as possible. You're creating a disposable layer that keeps the stuff underneath fresher.

6. Fill the crock with enough water to just cover the top of the cabbage. If you have to add more than 1 cup, sprinkle a bit of extra salt, but no more than a 1/2 TBSP should be necessary.
7. Take a plastic foodsafe ziplock bag and push it into the hole, curling the ziplock part inside-out to hug the lip of the jar. You can also use a rubber band to secure, but it isn't strictkly necessary. Pour clean water into the new plastic cavity to form a water seal: the water in the bag won't mix with the water in the kraut, but it will form an airtight seal.
8. Put in a dark corner of the kitchen or even the pantry and let sit. Wait 3 weeks.
9. Gently remove the water seal + plastic bag and transfer to smaller jars for storage, then refrigerate.

Unfortunately, much like the coronavirus vaccine, you might be waiting a bit until this one is available for consumption. Natural sauerkraut takes 3 weeks and up to 1 month to fully mature. The microbes in the broth need time to work, but the process is powerful enough to kill e-coli and salmonella. The cheapness, the ease, and the payoff is worth it.

There's no big trick to prevent it from spoiling. Just make sure the kraut stays covered in water and the baggie stays in place. You'll see it start bubbling within a week, so you may need to press down to get the carbon-dioxide bubbles out. On the off-chance that something went wrong, those whole cabbage leaves on top will be the ones to go bad. They can be discarded and the rest of the batch is fine to eat.

Yes, you can also use this technique for other veggies, though I recommend at first layering them into the 'kraut before trying to pickle them on their own (unless you pursue further instruction on pickling that veggie). Sliced onions, whole garlic cloves, peeled carrots, sticks of turnip, and even raw beets are good additions. Many spices go well but use in very small amounts. Allspice, fenugreek, mustard seed, cumin, and coriander are good choices.

Fermentation secret: tannins are what keep the veggies crunchy, which you can add via a fresh grape leaf, or some loose tea leaves at the bottom (not a tea bag). The tannins preserve the crunchiness of the original veggie and is especially useful to keeping cucumber pickles extra-crisp. The trick works for kraut so if you like yours extra-crunchy, add a grape leaf.
 
Last edited:

Blond

Banned
Alright, I tried to be fancy but ended up being mediocre instead.

1 medium onion (yellow for me)
2 pounds of cubed meat
3/4 cup sour cream
1/4 cup mayo
1 pound of brown mushrooms
Homemade beef stock or broth preferred, but store bought will do.
Salt, pepper and thyme to your liking

Enjoy my shit video with my superior music taste to cook too.

Shits like 3 carbs a serving.

 
Last edited:

CrapSandwich

former Navy SEAL
This is a slightly altered version of Chef John's delicious chicken enchilada recipe available at Chef John's site.

Chicken Enchilada
Prep 25 m ∙ Cook 15 m ∙ Makes 6 servings ∙ Difficulty Medium ∙ Source Chef John
INGREDIENTS
  • Sauce:
  • 3 tablespoons butter
  • 3 tablespoons olive oil
  • 1 cup diced onion
  • 1 teaspoon salt
  • 5 tablespoons all-purpose flour
  • 3 tablespoons ancho chili powder
  • 2 teaspoons cumin
  • 1 teaspoon chipotle chili powder
  • 1 teaspoon black pepper
  • 1/2 teaspoon oregano
  • 1/2 teaspoon cayenne pepper
  • 1/2 teaspoon cinnamon
  • 5 cloves garlic, minced
  • 3 tablespoons tomato paste
  • 4 cups chicken broth
  • Filling:
  • 18 corn tortillas
  • 1.5 lbs. chicken, shredded
  • 4 green onions, diced
  • 1/2 bunch cilantro, chopped
  • 12 oz. Pepper Jack, shredded
  • 8 oz. Mexican blend cheese, shredded
DIRECTIONS
Melt butter with olive oil in a saucepan over medium heat. Add onion and salt; cook and stir until onion starts to turn golden brown, 3 to 5 minutes. Stir in flour, chili powder, cumin, chipotle, black pepper, oregano, cayenne, cinnamon, and garlic. Cook and stir until fragrant, about 3 minutes. Add tomato paste and mix until fully combined. Pour in chicken broth and whisk until smooth.
Set heat to high and bring sauce to a simmer. Reduce heat to medium-low and simmer, stirring occasionally, until flavors come together, about 10 minutes. Taste and season as desired.
Preheat the oven to 410 degrees.
Cover a casserole dish with enchilada sauce. Place a tortilla on top and add chicken, pepper jack, cilantro, and green onions. Spoon on more sauce and repeat layers, finishing top layer with sauce, the remaining pepper jack and mexican cheese blend.
Bake in the preheated oven until cheese melts and sauce is bubbling, 13 to 15 minutes.
 

GymWolf

Member
my culinary skills start with making bread and melted cheese and finish with a flavourless frittata, not really helpfull...

but i made a killer microoven frozen pizza 😆 (the secret is thinking that you are tasting something else while eating it)
 
Last edited:

Sejan

Member
my culinary skills start with making bread and melted cheese and finish with a flavourless frittata, not really helpfull...

but i made a killer microoven frozen pizza 😆 (the secret is thinking that you are tasting something else while eating it)
I highly suggest taking some time to learn cooking. It’s a great way to save some money by eating out less often. Choose something that you are interested in making and find a recipe. You don’t have to worry about special techniques or ingredients to make something worth eating. You’d be surprised how quickly you can learn to make a few dishes worth eating.
 

GymWolf

Member
I highly suggest taking some time to learn cooking. It’s a great way to save some money by eating out less often. Choose something that you are interested in making and find a recipe. You don’t have to worry about special techniques or ingredients to make something worth eating. You’d be surprised how quickly you can learn to make a few dishes worth eating.
nah in reality i usually eat simple things like chicken, salads, white fish, a lot of meat, eggs, potatoes etc. not really complicated things to cook in a "eatable" way.
i don't have passion for cooking and i have zero fantasy or skill in the kicthen but it's ok, in this way i enjoy more when i eat tasty food in restaurants or when i buy some special shit during travels and such.

i just don't have the green thumb for cooking like some people, and i'm too lazy to even start trying tbh. 😆
i like eating but i hate cooking:lollipop_grinning_sweat:
 
Last edited:
I wanted to share a cooking tip for fellow chefs who hate to buy the same ingredients regularly and/or cooks who appreciate the nuance of fresh ingredients. But I didn't see a recent thread about cooking so I've decided to bump my own thread. Besides, it's related to the recipe in the OP

I hate buying the same spices week after week if they are shelf-stable. Awhile ago I got a mortar and pestle, not to be pretentious, not because "fresher is better" (although it is), but because I realized that I could buy a bulk amount of black peppercorns or cumin seeds or whole caraway or whole mustard etc etc and save a ton of money and headache.

Seriously, it's way cheaper. Get a mortar and pestle. A few ounces of ground cumin is several bucks. Or I can get a pound of dried cumin seeds and grind it up as I go. It's nice that it's fresher, i won't lie, but the real reason is I hate throwing together a scratch recipe (I rarely read out of a cookbook) and reaching for that pathetic end-of-the-bottle dusting of garlic or mustard or what have you. While searching through a trillion of these little containers I can feel my life force draining away.

GUEST_08ceae0b-4cbb-4e8b-9c23-11ff95aeccfa


Cumin gets used a lot in my house, like... an ounce or two per batch of hummus.

Maybe get a mortar and pestle for yourself for Christmas, a nice heavy one.

Lotsa places around the world going back onto lockdown. Figured the holidays were a great time to share recipes, share success/failures from the past year of lockdown, etc.

(also I hope to receive a special achievement for using "cumin" more times in one post than anyone else in GAF history)
 

Blond

Banned
Omg I need to post my jerk chicken recipe, I’ve made a whole jerk chicken once a month so I think I have it down enough to share. And it’s winter time now so it’ll get you grilling.
 
Here's a three-for-one.

Did you also jam-pack a deep-freezer full of several extra turkeys bought at Thanksgiving prices because of pending COVID lockdowns but you wanna make sure it's tender, flavorful, and juicy? I never cook a dry bird.

Roasted turkey + Broth Concentrate + Lentil soup

Roasted Turkey

1 Large turkey, thawed (if originally frozen)
2 white / yellow onions
4 peeled carrots
1 orange (a lemon or a grapefruit works too)
8oz butter
olive oil
1 fresh garlic clove, finely chopped
salt
black pepper
some white wine, a shot of gin, vodka, etc
(optional holiday spices include ground sage, thyme, and rosemary)


1. Preheat oven to 260F / 127C. We're goin low and slow.
2. Melt butter with a bit of the olive oil. Mix your spices into this liquid. Place your turkey into a large enough pan, preferably with a lid (if no lid, use a tent of tin foil). Don't be shy with the salt, because you're flavoring quite a few pounds of bird.
3. Using your hand, separate the skin from the meat by gently lifting/peeling it away without ripping the skin off. Reserve the neck bones and organs for the next recipe. Take the melted butter / oil / spice mixture and brush it underneath the skin, over the skin, and in the belly cavity.
4. Peel and cut the onions in half. Cut the orange in half. Peel carrots. Stuff em all into the turkey's belly cavity.
5. Before putting in the oven, christen the turkey with a splash of white wine, gin, vodka, or another suitable alcohol.
6. Cook turkey in a covered pan at 260F / 127C for approximately 20 minutes per pound i.e. 9 hours for a 28 pound bird.

IMPORTANT MIDDLE STEP - during this lengthy period of slow cooking, check your turkey every 2-3 hours and reapply juices from the bottom of the pan. This is not really for the sake of juiciness or crispiness but for flavor.

7. Once the turkey has slow-cooked for the duration, take it out for one final reapplication of juices. Raise oven temperature to 375F / 190C and cook the turkey WITH LID REMOVED for approximately 30 minutes. You should eat the turkey when it is sufficiently browned/crispy on the outside and the internal temp in the thickest part of the turkey breast reaches the desired temp**
8. Let the turkey rest for about 10 minutes, then carve

**Turkey temp guide:

Okay, so you made a delicious turkey and impressed your lockdown-cult with the only non-human meat they'll eat for a month. Surely there's a way to stretch this out further? There is! I make this recipe later in the night after cleaning up the turkey roast.

Turkey Carcass Broth Concentrate

1 turkey carcass from above recipe, carved of all meat
turkey organs and neck bones
1 bay leaf
3 whole peppercorns
2 onions, peeled and cut in half
4 carrots, peeled and chopped
4 stalks of celery, chopped
2 packets of unflavored gelatin (approx 0.5 oz)
1 tbsp salt + more salt to taste


1. Place all ingredients except the unflavored gelatin in a large stockpot. Fill stockpot with water.
2. Bring to boil on the stovetop. Add gelatin.
3. Reduce heat and bubble/simmer for a minimum of 2 hours
4. Before you let it cool down a bit, taste it and make sure it's salty enough. Doesn't have to be too salty (more can be added) but you don't want it to be bland, either.
5. Let it cool down, strain out all the chunks and reserve liquid in a separate bowl. Refrigerate overnight and put into smaller bags/containers if you wish. It'll be thick, like the consistency of pudding or...well.. gelatin. Use this as a base for any soups.

Lentil soup

1 lb of dried lentils, rinsed and soaked for at least 10m in water
3 cups turkey broth concentrate
3 cups water
olive oil
4 carrots, peeled and chopped
2 onions, peeled and chopped
1 potato, peeled and chopped
extra turkey meat from your roast (halal), or 2 pork chops (haram), pan-cooked with salt and chopped into cubes. If you love meat like me, just add both 🤷‍♀️
salt
black pepper
cumin

1. Heat 2 tbsp olive oil, add salt, and brown the onions, carrots, potato, and meat chunks.
2. Add pepper, cumin, turkey broth, water. Bring to boil. Taste and adjust spices (e.g salt) if needed.
3. You tasted it first, right? Okay, add the lentils.
4. Reduce heat to a bubble/simmer and cook until lentils are fully tender, about 30 minutes
5. Remove 1 cup of the ingredients (try to get mostly lentils) and mash it up, then return to soup. Or you can chill overnight and let the soup soak up the broth
6. Serve! (either fresh or re-heated)
 
Last edited:

Blond

Banned
Feel free to ask questions if I didn't make anything clear enough!

Well I'm too lazy to make a video but here's my jerk BBQ chicken recipe. You can do this in a day but I personally say make it over 2 days so you can really enjoy the fruits of your labor. I personally think the long term work pays off with a superior end result.

What's required in order.

Grill:
A chunk of wood preferably
or
Charcoal with pimento wood chips, doesn't have to be pimento because I've used apple to jack Daniels before with no real preference but I love smoking meats with a chunk of wood!
Meat thermometer

Meat:
1 Whole chicken, separated into 8 pieces

Brine
Enough water to cover chicken, half-gallon to a gallon depending on the pot
3 tbs salt
1 tbs of vegetable oil
1 tsp of all spice
1 habanero
1 small knob of ginger
3 garlic cloves


Jerk Paste
Advice before starting: TASTE WHILE YOU GO!
I cannot stretch enough that this is everything I use to start and sometimes will even add more
Start with 2 habanero peppers, taste after you blend together and add the third if you want it spicier if the heat level is too low. Pepper quality will vary, I once had to use 6 to even get any level of spice but 2-3 is a very comfortable place to start.

3 Habanero peppers
8 cloves of garlic
1 tea spoon of allspice (to start)
1 bunch of fresh thyme, chopped
1 ginger knob, chopped
1 Yellow Spanish onion or 1-2 bunches green onion (depends on your taste preference I go either way depending on what the grocery store has)
1 lime squeezed
1/4 cup of soy sauce
1 tsb of molasses or brown sugar (if you want or if you made it too spicy, this will cut down on that along with the lime juice I often don’t even use this)
Black pepper, to taste
1 dash cinnamon

When done, save a quarter of it for the BBQ sauce

Chicken Coating

1/2 Cup brown sugar
1/2 Cup Salt
I've sometimes had to use upwards of a cup each for larger chickens YMMV but 50/50 is always where you want to go.

BBQ Sauce
Leftover jerk paste
2 TSB vegetable oil
1.5 Cup ketchup
1 small chopped onion
2 cloves garlic
1/4 cup brown sugar
---------------------------------
The Process!

1. Separate the chicken into 8 pieces, set aside

2. starting the brine process, chopped the vegetables and sauté them in the oil and right as they begin to wilt add the all spice, stir a little and add the water and stir till everything mixes together. Heat till it's just warm and let it cool this is can take a couple hours. Add the chicken and let it sit overnight (24 hrs preferably).

3. Begin with making the jerk paste, chop all the vegetables, add them to a blender or food processor along with the soy sauce, cinnamon and molasses/brown sugar. Save a quarter amount to make the BBQ sauce). Set both aside over night either in jars or covered bowls. (You can go ahead and make the BBQ sauce if you want, but I much prefer to do that before I begin to grill)

4. After brining the chicken overnight, pour out the water and set aside. Mix togther the salt and brown sugar coating, coat the chicken pieces with this followed by the jerk paste. From here you can either put them in the fridge for an hour or another 24 hours for it to soak in in a covered bowl/dish.

5. After letting it sit for your preferred amount of time, take it out the fridge and prepare your grill. You can either set it for searing or smoking, I prefer a 2 side set-up for long term smoking.

6. While the grill is heat, sauté the BBQ sauce vegetables till they're wilted, followed by the ketchup, brown sugar and leftover jerk paste and set aside and simmer for roughly 5-10 minutes until the sauce darkens slightly in color and set aside.

7. Depending on the way you grill follow these directions. Either method you want to keep adding wood chips to keep the smoke flavor coming!

160 White Meat
165 Dark Meat

Searing: Turn often, check meat with thermometer till it's 160-165 degrees. When you begin to reach the 150 degree threshold apply bbq in light passes till it's reached the appropriate temperature.

Smoking: Similar to searing, but you'll want to sear each side until crispy maybe a few minutes on both and move to the fireless side and let the smoke do all the cooking. When reaching the threshold, which can take a couple hours or as short as 40 minutes. (I prefer high temp smoking that ends with a searing to crisp up the skin and saucing, but a long term smoking is even better) Like searing, once it reaches 150 I begin searing and flipping with light brushes of the jerk bbq sauce and on the final flip towards the skin I apply brushing to the top and searing it till it's 160-165.

8. Plate with some veggies and rice and peas substituted with coconut milk instead of water or a couple slices of white bread.
 
Last edited:
keep forgetting to post this here

miso pork chop

4 pieces of pork chops
2 tablespoons of soy sauce
around half a spoon full of grounded pepper or white pepper powder
3 tablespoons of Asian style cooking wine
a dash of paprika
1 tablespoon of sesame oil
1 tablespoon each of red miso & white miso (or if you don't want to bother, just 2 tablespoons of red miso is fine)

mix everything except the pork chop well in a cup or bowl. then use a sealable container to put the pork chops in and pour the mixture onto the pork chop. leave it in the fridge for 1 to 2 nights (can be more if you're not eating it right away). side note, this mixture is great for chicken also.

when ready to cook them. heat up the oven to 375 F or 190 C first. then heat up a pan with some butter (make sure the pan has metal handle since we'll be putting it inside the oven). sear both sides of the pork chops for 2 minutes or so each. then place the pan inside the oven for 10 to 15 minutes depending on how you like it. then take out and enjoy.
 
Top Bottom